

Ah, a beloved hat wall. Chances are you’ve seen this trend recreated countless times by your favorite bloggers, influencers, etc, etc. It’s popular for good reason! I love the look and it’s practical too. Lucky for you, it’s super easy and inexpensive if you’re looking to create your own DIY hat wall! Continue reading for my tips and tricks.
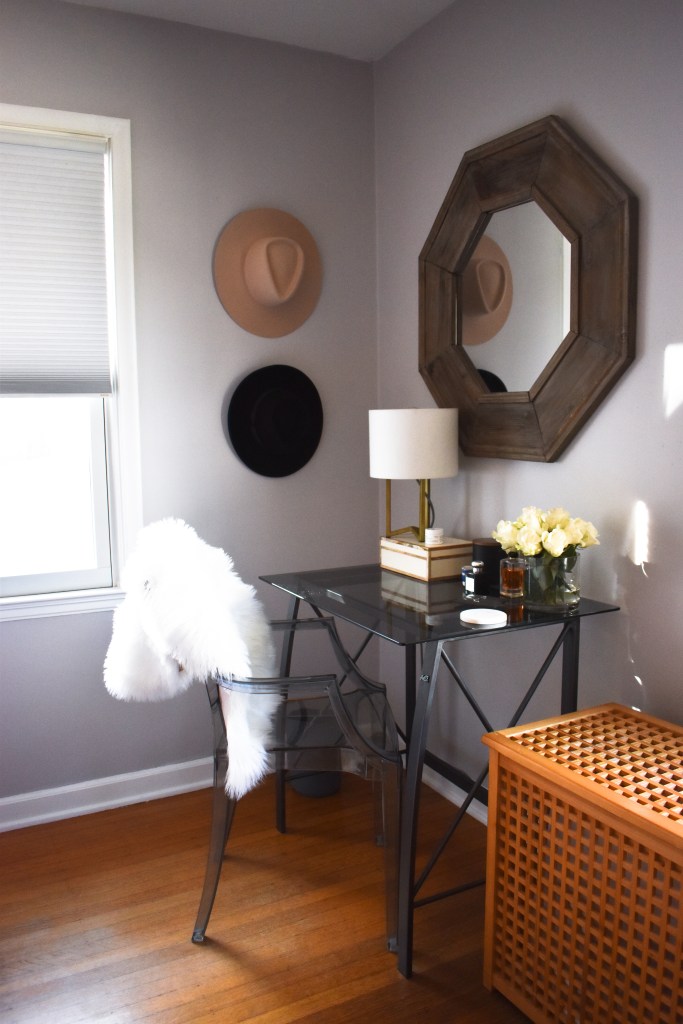

I decided to hop on the hat wall bandwagon because I thought the look was chic and I also wanted a functional way to store my new wide brim hats. Considering I had just spent a pretty penny on these gorgeous Gigi Pip hats for my birthday, I wanted to keep them nice and safe from getting damaged. Sure, hat boxes work too, but nice ones can get expensive and I barely have enough closet storage as it is.


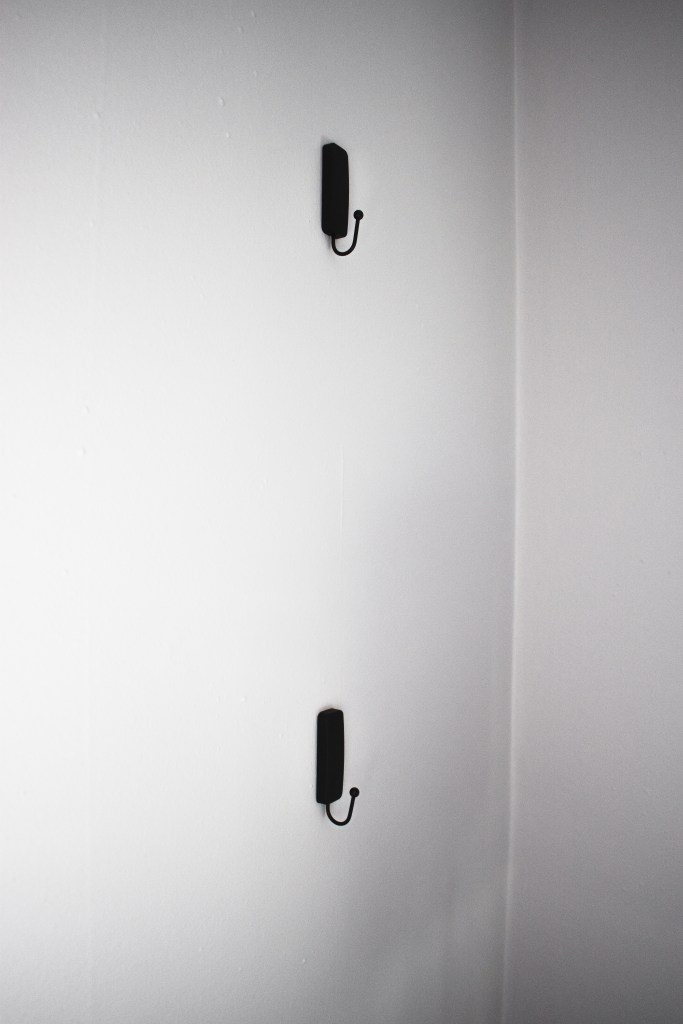
My hat wall cost me less than $12 and only required 2 command strips. I bought the decorative black metal command strips from Target because I wanted my wall to still look half way decent when I was actually wearing one of the hats. I didn’t want some cheap piece of plastic hanging there, but it totally depends on personal preference. It would cost even less for the standard plastic command strips.
I simply eyeballed where I wanted my hats to hang, then secured the command strips where the tag of my hat was. Simple as that! Just make sure to read the instructions carefully, and put the correct sticky side against the wall 😉
If you are curious about my Gigi Pip hats, I have the Monroe Rancher style in black and the Dakota Triangle Crown in cream. They are seriously such great quality, and I get compliments on them all the time. They’re definitely worth the splurge if you’re in the market. You just have to get used to the diameter of the hat at first. I still frequently run into door frames with my brim 😉
Let me know if you try out the DIY hat wall! Leave your comments below.